Belvedere Waistcoat Sew-Along: Day 6 - Apply interfacing and sew darts (plus learn how to create a tailored front!)
I'm really excited about today's post because we are going to add structure and shaping to our waistcoats...and I've kicked it up a notch from the instruction booklet and tried out a few tailoring techniques to share with you!
Are you ready to try your hand at pad stitching, working with hair canvas and shaping with steam? No? Don't worry, we'll cover the standard approach to interfacing and darts first...and you will wind up with a beautiful waistcoat that will look dressy enough for any occasion. The advantage of the tailoring techniques that I've tested out later on in this post is that they will allow your waistcoat to look just as fresh and structured ten years from now as it will when the wearer tries it on for the first time.
Apply Interfacing
Let's begin with the standard approach (don't apply your interfacing right now if you are working with a bulky wool and would like to try your hand at tailoring...instead, read the rest of this post!).

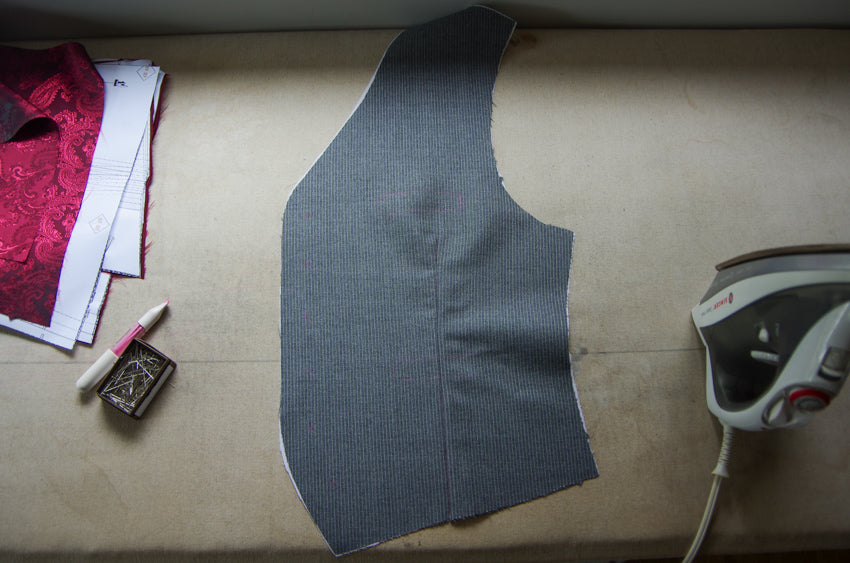
Lay out your waistcoat front pieces so wrong sides are facing up. Press thoroughly if there are any creases in your fabric.

Place the fusible interfacing pieces on top of your fabric and melt the glue by pressing with lots of steam. Make sure you press for a long enough period to thoroughly melt the glue dots. Also apply interfacing to the welt pieces if you are sewing Variation One. Now it's time to mark the pattern details on to our waistcoat fabric pieces:
Mark Details
I have two different methods to show you - one involving pins and one involving a needle and thread. My favourite method for transferring dart, buttonhole and pocket markings is to use pins.

I place pins on the relevant points through both layers of fabric and the paper pattern piece. Points include the tip of the darts, the widest point of the darts, the button placement markings and all four corners of each pocket.

I then flip the three layers and poke another set of pins in the opposite direction (using the first set of pins as a guide for placement).

Next I pull the fabric off of the paper pattern pieces so that one set of pins remains with the paper and the other set remains with the fabric.

I use the pins as reference points to fill in the marking lines with chalk.

A more traditional approach to marking pattern details is adding tailor's tacks with needle and thread. Thread a needle with a double strand of thread (in a contrast colour so you can see it easily!).

Poke your needle through the paper and both fabric layers. Bring the needle back up through all layers. Here is a view of the underside (it's a loop!):

You can do this a couple of times if you like so that there are loops on each side.

Separate the paper and fabric pieces gently.

Snip the threads between each layer.

And here is the end result:

Fill in the lines with chalk if you would like.
Sew Darts
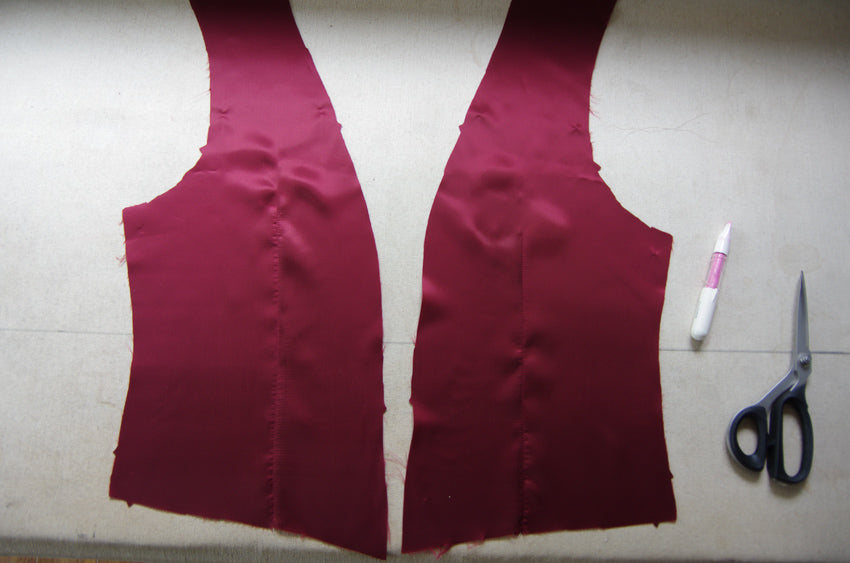
Using your freshly made markings, it is time to sew the darts on the waistcoat front, front linings, back and back linings. Fold the darts in half and begin stitching at the hem:

Stitch all the way until the point and simply stitch off of the fabric (without backstitching).

You will be left with a tail of thread. Tie this thread in a knot by hand. This technique will reduce the amount of bulk and potential bubbling at the point of the dart.

Here is the finished dart on the waistcoat front:

From the right side of the waistcoat, press the bulk of the dart towards the side seam. Don't try to press the entire waistcoat flat since the purpose of the dart is to add curved shaping to the waistcoat front (see how the fabric ripples near the side seam?).
Repeat this process for the front linings:
But this time press the bulk of the dart towards center front. This will reduce the overall bulk so that your dart is not very visible on the right side of the waistcoat.

If you are adding the free download for a narrow cinching belt, this is the time to sandwich it in to the waistcoat back darts. With or without this belt, sew the waistcoat back darts and press the bulk towards the side seam.

Sew the waistcoat back lining darts and press the bulk towards the centre back.

And now you are ready to add your facings to the lining pieces! We will be covering this tomorrow. If you would like to venture in to a few tailoring techniques with me, read on, otherwise, see you tomorrow!
Tailoring the waistcoat fronts
I am experimenting with two resources to tailor my waistcoat fronts. I want to be clear that I took construction classes in design school that taught us some excellent techniques but we never ventured in to tailoring. It is something that I have been very curious about for years and have read about often...but I haven't really applied what I have learned! Today I am doing this at last. If you are proficient at tailoring and notice mistakes or omissions, please don't hesitate to point them out to me! I would love to hear your opinions so that I can learn more! I hope you enjoy learning a few of these techniques with me:

Let's begin by sewing a simplified couture dart suitable for lofty wool fabrics. If you are working with a thin suiting or other material that is not especially bulky, you can sew the dart as per normal and press it to one side. I actually sewed the sample below in school but never applied it to any of the garments we drafted in class.

The dart above may look ridiculously complicated but the concept is simple - we are trying to distribute the bulk of the dart evenly so that it is not visible from the right side of the garment. Lofty wools can show a ridge where the dart is positioned unless you take some preventative measures. Since the darts on the Belvedere are very narrow, the full trimming and pressing technique shown above won't work (it's next to impossible to trim down the middle of the dart almost to the point).

To simplify the process but still distribute the bulk at the point of the dart over a larger area I cut a square of wool measuring approximately 1.5" X 1.5".

I positioned it centred underneath the point of the dart. I then followed my original dart stitching line to secure it to the dart.

I trimmed as far as possible down the center of the dart and pressed it open. I then pressed the rest of the dart flat.

From the right side of the garment you can see that there is no obvious dimple at the point of the dart because the added square distributes the wool 1.5" around the dart point. Now that the dart has been sewn, it is time to apply the structure. You will notice that this is a different order of construction from the steps above! Sew-in canvas stabiliser is too bulky to apply to the wool and then sew the dart. The darts must be sewn on the wool and the stabiliser separately and then the two layers are attached together.

I am following along with the very succinct and clear tailoring instructions found wihtin the 1976 edition of the Reader's Digest Complete Guide to Sewing. If you are ever able to get your hands on a copy of this book I HIGHLY recommend it. It is by far my most valuable sewing resource. The older editions of this book (such as this 1976 version) also include a great section on tailoring for men specifically. I believe newer copies do not include this. Click on the photographed images to enlarge and read the pages that I'm referring to.


Even though the waistcoat that I'm tailoring is actually for me (yay!), I've decided to add a chest piece as per the instructions within the "Sewing for men and boys" section of this book since this chest piece is an important aspect to sewing a tailored garment for men. The layers of stabilizing fabric fill in the hollow typically found under a man's shoulder. I must note that I think I also have this hollow...I don't know if chest pieces are typically added to tailored women's waistcoats and blazers but I think it will be a nice addition to mine!

Here is my wool canvas stabiliser with the dart sewn:

Lay this interfacing piece on top of the waistcoat front so wrong sides are together.

Mark the roll line if you have added a collar to your waistcoat. This is the line where you will fold your collar over to make the facing visible. It should end just above the top buttonhole.

Baste the stabiliser to the wool along the roll line. Just catch the wool so that your stitches are not visible from the right side of the garment. Please note that you would normally be better off using a thread colour that matches your self fabric. I've used a contrast colour (black) so that my stitches are easier for you to see.

Now it is time to pad stitch the entire stabiliser to the waistcoat front. Make long stitches through the stabiliser and just catch the under layer of wool (stitches should not be visible from the right side). Do not stitch within the 5/8" seam allowances because we will be cutting in to these later.

Instead of creating large pad stitches on the collar, roll the collar over your hand and stitch small chevrons that encourage the fabric to shape to the curve that you have created.


Cut 5/8" seam allowances off of the stabilising wool canvas so that your seams and seam allowances will not become stiff and bulky.

Fix your stabiliser to your wool by catch stitching around the entire perimeter.

To prevent stretching out and sagging even more, you can apply twill tape to a number of areas. The common placement is along the roll line of the collar (so that it does not extend in to the collar but is instead placed beside the collar on the waistcoat front) and down the front of the waistcoat. I only applied it to the roll line because I did not have 1/4" twill tape (I only had 5/8" twill tape) so I thought mine would be too bulky to curve along centre front.

Stitch around the entire length of twill tape. Make sure to trim the tape so it does not extend in to the seam allowances.

Use a very steamy iron and a seam roll or tailor's ham to shape the collar. Since my collar is a very narrow shawl collar (rather than something wider) the shaping did not make a large impact. I wound up steaming the fabric and shaping the hot fabric with my hands to get any sort of visible curve:

Now that structure is added to the waistcoat front it is time to fill in some indents. To create a chest piece it is recommended that you use stiff and resilient horse hair canvas. If you wanted softer structure you could use the same wool canvas that you used for the rest of the waistcoat front stabilising job.

Cut a small curve as shown above (use the Reader's Digest image photographed earlier as an example).

Cover the first layer with a larger curve that extends the entire length of the armhole.

Cover the first two layers with the largest curve as pictured above.

Pad stitch all layers in place ensuring that your stitches are not visible from the right side of the waistcoat. Note that you can add as many layers of stabiliser as necessary to fill in the cavity between the shoulder and chest (the Reader's Digest book actually suggests one more layer than I used.)

Finally attach the chest piece to the waistcoat front more securely by catch stitching along the roll line and side seam.

And there you have it! May I present to you my first, from scratch, tailored waistcoat front! Any tips for me? Head to our shop to find wool stabilising canvas (the main brown fabric that you see here as a stabiliser), and hair canvas (which (I used to create the chest piece).
