Haslam Hat Sew-Along: Day 2 - Repurposing a Ready Made Sweater
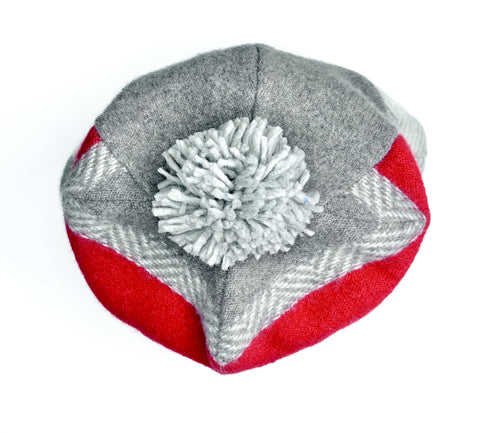
Sewing the Haslam Hat Variation 1 with a Pom-Pom
Do you have a sweater sitting in your closet that you don't wear anymore or found one thrifting that you might not wear but loved the texture or color of the fabric? Not sure what to do with it? You can use it to make a Haslam Hat! Here I will demonstrate how you can repurpose a ready-made sweater for your project.

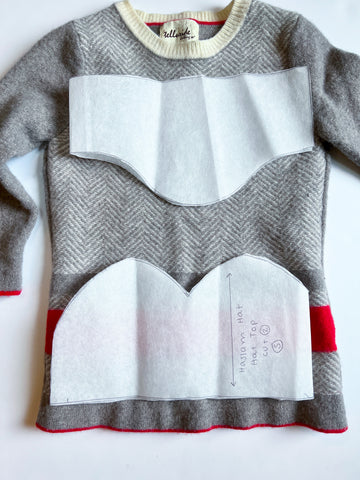
Here is a vintage sweater that stood out to me as a great candidate for repurposing. The various grey shades, chevron design, and red accent could be reworked to create a unique hat. However, it did take some time to figure out exactly which parts of the sweater to use and how.
To begin, I arranged the various pattern pieces throughout the sweater to see where I could cut to get the most out of the fabric.

I realized at this point it would be inevitable to piece together parts of the sweater to get full-length pattern pieces. So, I folded the sweater along the center front and back to see where the side seam of the sweater would end up.

Next, I decided to pair polar fleece fabric with the sweater for an extra pop of color.

Using the pattern pieces again, I experimented with placement for how the finished design would look.

Once I had a solid plan, it was time to cut into the sweater!

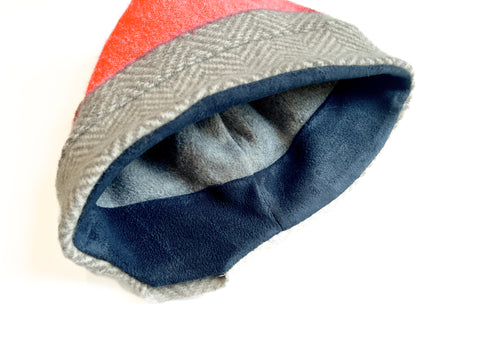
The result of cutting into the sweater was a success! Utilizing the full width of the center front I could use the red stripe for the hat top. Due to the shape of the sweater, I was not able to get a full-length hem band piece out of the chevron design, so I added some seams which would align with the seams on the hat top. For the lining, I used some super soft polar fleece in grey and dark blue for contrast.

Time to start sewing!
Take the outer hat top piece and place it with the fabric right side up on your workspace.
Fold one outer dome section of the hat top towards the center with the right sides together. Match the first two sets of points together and the curved V-cut out.
Stitch along the curved edges at 5/8" (1.5 cm), creating a curved dart. Press the seam allowances to one side.

Repeat for the opposite side of the hat top, leaving the center unsewn for now.

Open up the hat along the seams and position the hat top so that the two dart seams meet, and the raw edges of the center of the hat top are aligned. Stitch along the curved seams at 5/8" (1.5 cm).

Side view:

View from the finished top:

Turn the hat top right side out.
At this point, try on the hat top and see how it fits around the crown of your head. If you wish for a more fitted look you can extend the dart points to be longer and curve down further on the hat top.

Next, it was time to piece together the fabric scraps to make a full hem band piece.
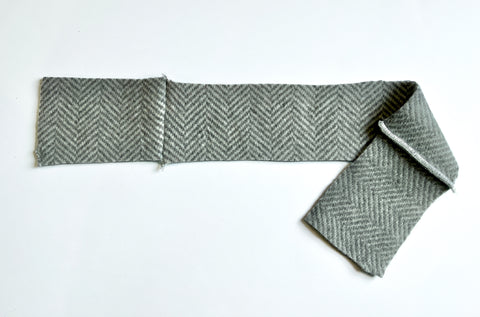
Now we have the outer shell of the hat top and hem band complete.

With right sides together, notches and seams aligned, stitch the hat top to the hem band at 5/8" (1.5 cm).

Repeat all the same steps to create the hat lining.

Turn the hat top shell wrong side out and keep the hat top lining right side out. Match the raw edges of the shell to the lining so that the right sides of the fabric are together and the seams are aligned. Stitch around the edges at 5/8" (1.5 cm). Leave a gap near the back seam about 3" – 4" (8 cm – 10 cm) wide.

Pull the shell and lining through the seam opening so that both the shell and lining are right side out.
Press the bottom edges of the hat in place. Using a needle and thread, hand sew the opening closed.

With seams aligned stitch in the ditch, through the shell and lining layers, along the seam connecting the hem bands to the hat tops.
For extra reinforcement or decorative finishing, topstitch around the edges of the hem band and on the hat top.

How to make a Pom-Pom:
If you are using a pom-pom maker, follow the manufacturer's instructions to make your pom-pom. If you do not have a pom-pom maker follow the steps to create a pom-pom.
Cut a piece of cardboard as shown in the diagram. You can either create a C-shape (shown in the Haslam instruction booklet) or a rectangle shape (demonstrated here) out of cardboard. Keep in mind the width of your cardboard cut-out will determine how big your pom-pom is.

Wrap yarn around your template. The more yarn you have around the template will determine how fluffy your pom-pom will be. If you want a looser pom-pom wrap less yarn.

Once you're done wrapping the yarn, trim the tail. Next cut a long piece of twine or similar strength string.
TIP: You can use yarn for this part, however, twine or a similarly strong, thin thread is ideal as it will not break or come apart as easily. Twine will also blend into the pom-pom better and will be easier to sew with in later steps.
Wrap the string around the middle of the yarn bundle.
Take your scissors and slide one blade between the outer cardboard edge and the yarn. Carefully cut through the yarn creating a bundle. Tie the string around the middle of the bundle tightly to secure the cut yarns.

Pull the yarn off the cardboard.

Fluff out the yarn so it becomes a pom-pom. Trim around the pom-pom to even out the strands of yarn, but do not cut the string tails as you'll use those to attach the pom-pom to the hat.

One at a time, using a darning needle, thread the string tails through the center top of the hat. Tie and knot the strings together on the lining side of the hat to secure the pom-pom.