Fairfield Button-up Sew-Along: Day 7 - Pockets, Pleats and Darts
Today we will be adding the chest pocket to the Fairfield shirt front and the darts or pleat to the shirt back.
Adding a Chest Pocket
The first step to adding a pocket to the left chest front is to determine it’s placement. You can either follow our suggested placement markings or you can pick a position that suits the wearer’s proportions.
My favorite way to transfer pattern markings from the paper pattern to fabric is to use pins (you can also use a tracing wheel and transfer paper, tailors tacks or any other method that you prefer).

To use pins, place your pattern on top of your fabric and stick a pin through each placement marking.

Flip the pattern/fabric bundle over and use the sharp points of your pins as a guide to place a second set of pins.
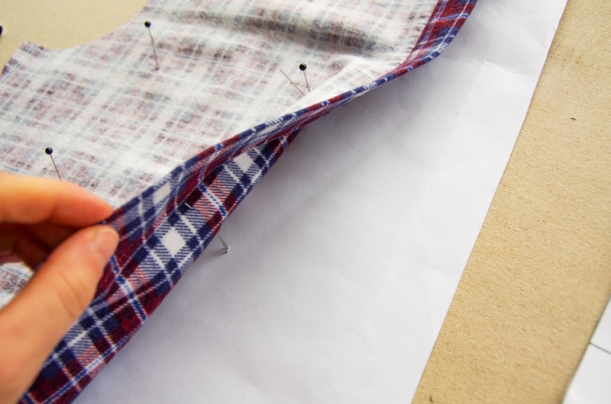
Peel the fabric off of the paper pattern piece. This will leave you with one set of pins in the fabric and one set of pins in the paper.

At this point, you can mark the pocket placement with pencil or chalk (using the pins as a guide) or you can just leave the pins in the fabric until your pocket is ready to place on the shirt front.
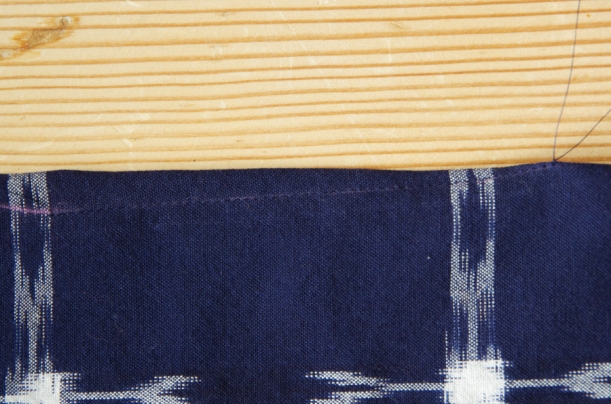
To prepare the pocket, first fold the top of the pocket under (wrong sides together) 1/4″ and press.

Now fold the top of the pocket with right sides together along the notched fold line. Press.
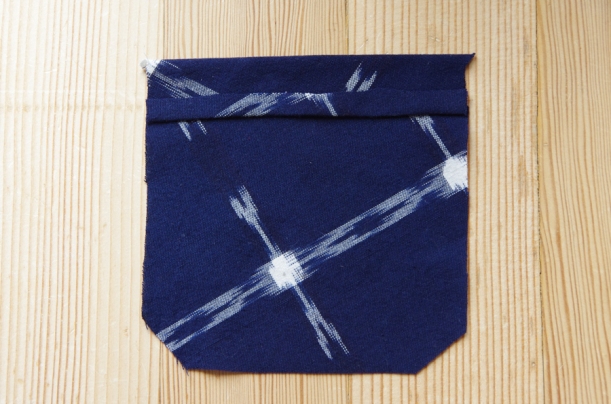 Stitch on either side of the fold using a 3/8″ seam allowance.
Trim the seam allowance to reduce bulk.
Flip the top of the pocket right sides out and carefully push out either corner until it is crisp. Press.
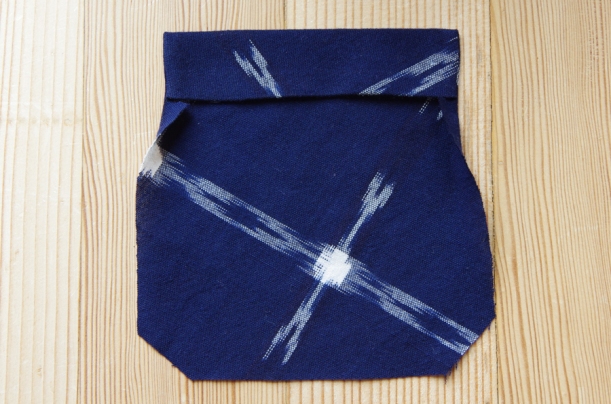
Fold in the remaining seam allowances 3/8″. Be careful to keep your seam allowances accurate because wavering allowances will cause the pocket to look noticeably misshapen.
Edge stitch along the pocket top to keep the folded fabric in place.
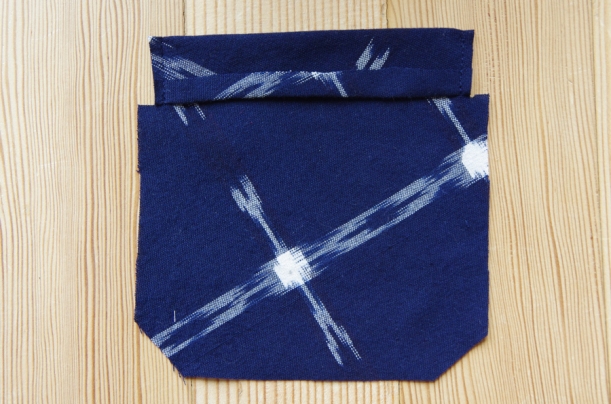
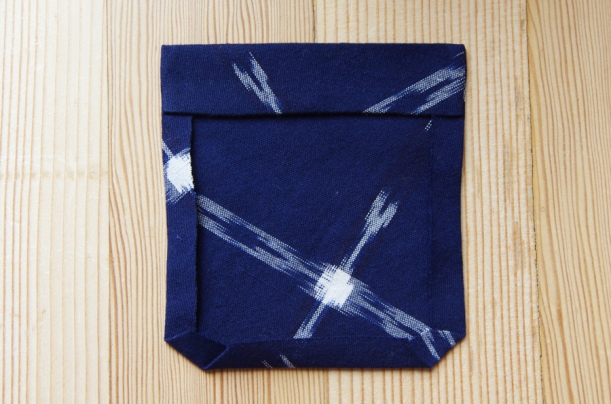
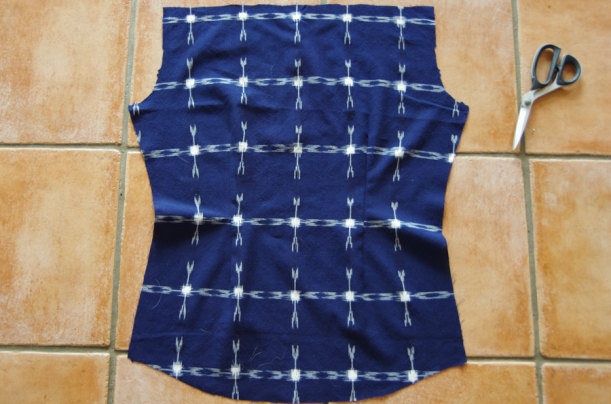
Place the pocket on to the shirt front using your pocket markings as a guide. The top corners of the pocket should line up with the top two placement markings. Position the pocket within the other two placement markings to make sure it sits straight.

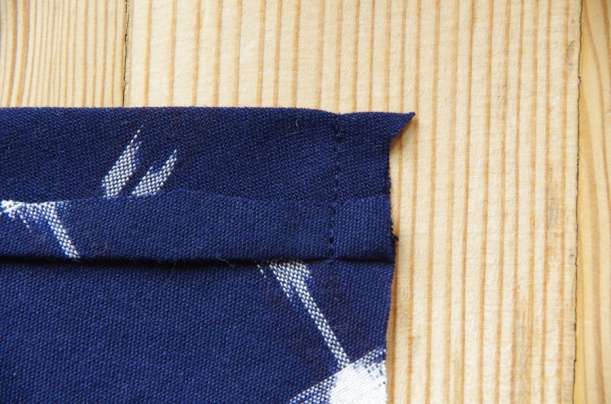
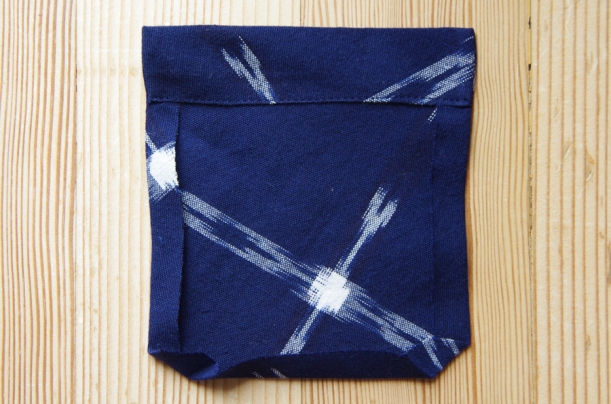
Edge stitch the pockets in place – you can use a variety of stitching styles. The two that I suggest in the instruction booklet are:

A small triangle of stitching at either corner of the pocket and one line of edge stitching. This results in a clean, minimalist pocket that suits dressier shirts (though ‘actual’ dress shirts generally have no pockets).
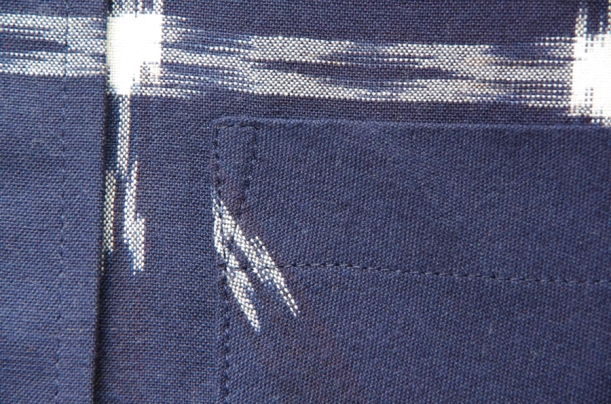
Here is a close up for the triangle in each pocket corner:
Or, two rows of stitching – one row of edge stitching and one row of top stitching. This look is best suited to more casual shirts.

Here is a close up of how I join the edge stitching and top stitching:

Sewing the Pleat (Variation 1)
Now that the pocket is finished, let’s move on to shaping the shirt back. The pattern includes two variations – a small box pleat or two shaped darts.
To sew the pleat, work with the four notches at center back. Position the shirt back so the right side is facing you.

Fold the outer notches (indicated by the green pins) inward so that they meet with the inner notches.
Here is what your pleat will look like from the wrong side of the shirt:

Press the pleat and stitch across the top of the pleat to hold it in place.

Sewing the Darts (Variation 2)
If you have chosen to sew the darts rather than the pleat, skip the above instructions.
Mark the darts in your preferred manner (I used my pin method) and chalk or pencil in the stitching lines using a ruler to connect the dots.

Pinch the darts in half with right sides together. The widest point of the diamond should meet and your chalk lines should be aligned. Pin thoroughly.

To avoid a pucker at either dart end, begin stitching at the center of the dart and work outwards. Stitch off of the fabric and tie a not (rather than back stitching). This will eliminate the risk of creating a bubbled dart tip due to bulky back stitching.

Repeat this for the other half of the dart.
Press the darts towards center back.

Are your shirts coming along well? They will really begin to take shape on Monday when we sew the yoke! Have a great weekend.![]()
